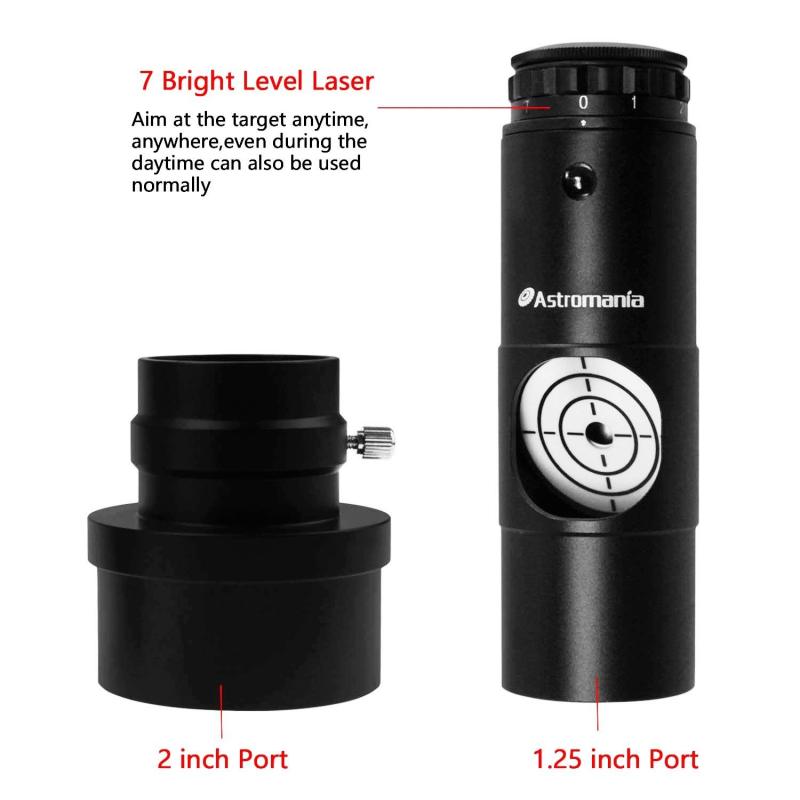


The Laser Collimator allows you to swiftly and precisely collimate your Newtonian telescope. Only when the optics have been accurately collimated can the telescope offer you its full performance. It designed specifically for collimating the optics of Newtonian reflectors.


 |
 |
 |
 |
| It has a side window that allows viewing of a 45° disk with a center hole. This canbe used later to see if the laser is reflected back toitself. | Red laser collimation beam with 7 brightness levels,wavelength 635-655nm; Output power: less than5mw, much safer for your eyes. | The Laser Collimator has been precisely aligned. However, it can be further adjusted if required. lt has three openings for adjustment. | Unscrew the rear cover with your barehands, although it is designed with anti-slip knurling. You can use your belongings to open it. |
 |
Installing Battery:The Laser Collimator is powered by one CR2032 battery (Not Included). When the laser beam starts to dim or completely fades, it’s time to replace the battery. To do so, unscrew the knurled battery compartment cap at the top of the collimator. With a knife tip or the end of a paper clip, lift the edge of the expired battery out. Insert a fresh CR2032 battery with the positive (+) side up. Then replace the cap |
Dual Language InstructionThis adjustment tool can be used in all 1.25" focusers. We provide you with precise instructions in German and English, with a step-by-step explanation of how to adjust a Newtonian telescope using this laser unit. So, even if you are a newcomer to amateur astronomy, it is very simple to get the optimum performance out of your telescope. |
 |
 |
Recalibrating the Laser Collimator
|
Care and Maintenance:Your Laser Collimator is manufactured of the highest quality components. The internal laser diode is precision aligned with the mechanical axis of the housing at the factory and tested to meet stringent specifications. Like all electronic equipment, the Laser Collimator should be handled with care. If it is dropped or handled roughly, the internal laser could become misaligned. Avoid exposing the collimator to water, dust, heat. |
 |


Copyright © 2005-2021 Astromania Co., Ltd. All Rights Reserved. POWERED BY UEESHOP
Copyright © 2005-2021 Astromania Co., Ltd. All Rights Reserved. POWERED BY UEESHOP


